Le Tresor Des Morts is an extra mission in Red Dead Redemption 2 that’s only available to those who pre-ordered the Special or Ultimate Editions of the game. If you didn’t you’re just not going to find this map as unlike other treasure maps in the game it isn’t sold by a fence later down the line.
Where to find Limpany
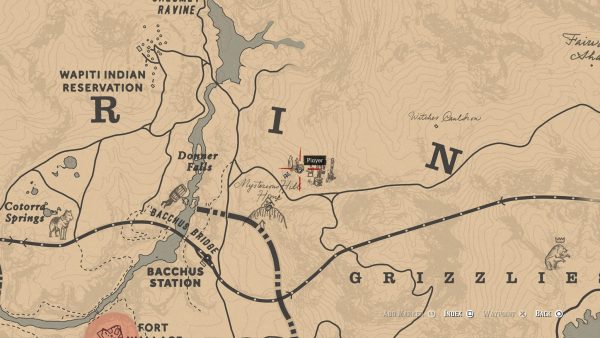
You’ll have to find the map first, so to do that you’ll need head over to Limpany, which is the old burned down town directly north of Flatneck Station. Your base camp at Horseshoe Overlook is close by, so the quickest way to find it is to head back to camp and start from there.
There’s a strongbox in the Sheriff’s office that has a gold bar in it. There’s a glitch you can currently exploit to get unlimited gold bars, so check out our guide for how to do it.
Where to find the Le Tresor Des Morts map
Once you’ve gathered as many gold bars as you can, head to the jailhouse – it’s the only building still standing.
Inside you’ll find two dead prisoners in jail cells and the one lying
on the cot has the rolled up map beside him. If you don’t see it,
sorry, you didn’t pre-order your version of Red Dead Redemption before
the deadline.
Take the map and examine it to see that it’s prompting you to look underground for the next map. You’re going to head to Saint Denis docks and look for a big building called the Cornwall Freight Station.
You need to be near the docks, and head down the steps you can see
the left of this screenshot below. Hug the wall at the bottom keeping it
to you right, and keep walking until you drop into the water.
The water is only waist height, so follow the edge of the docks to a
steel gate that opens to an underground passage (that connects the docks
to the Cornwall Freight Station). It’s here that you’ll find the map
behind a pocket of dirt in the wall, next to the only crate in the
corridor. You should also see an X carved into the beam here so it’s
easier to find that you might think.
This next clue is a rhyme rather than a map, and it reads:
Where the floods rise up,
But the dead stay dry,
And the colored light falls,
When the sun’s in the sky.
There to your left you’ll find our wealth,
It’s no good to us without our health.
There’s also a small sketch on the back of the note.
The dead stay dry in the cemetery, and the coloured light it refers to is a stained glass window.
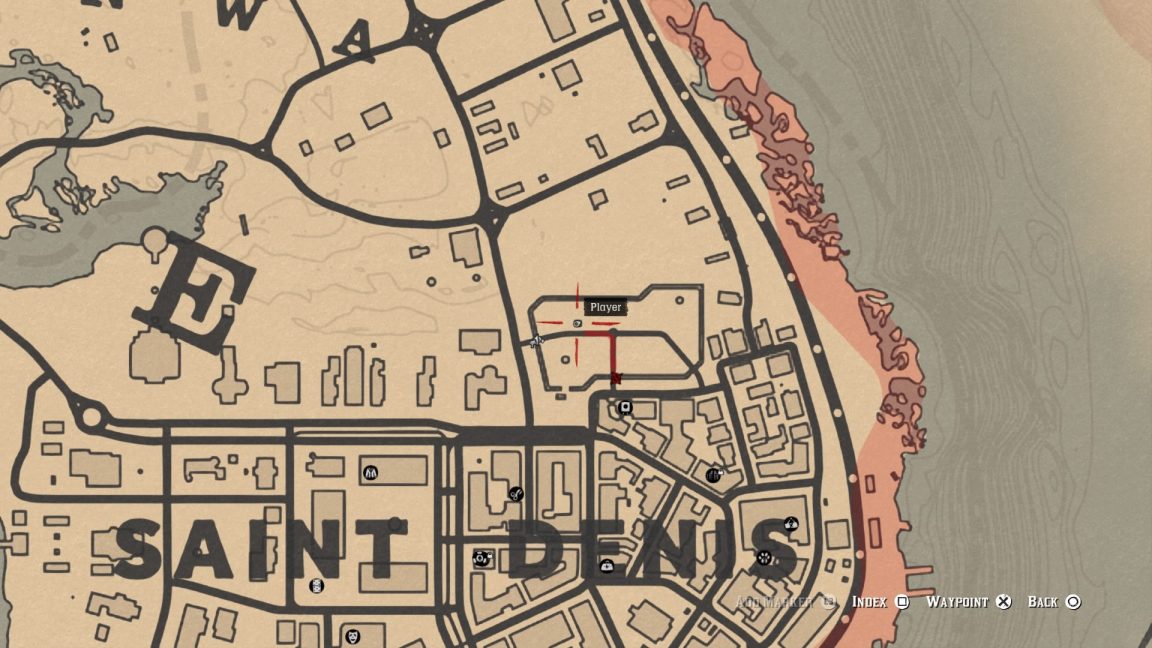
Your final destination for Le Tresor Des Morts is a short walk to the cemetery in Saint Denis.
Turn left/west at the dome in the centre, and look for the big
building with the stained glass window. Inside you’ll find a hole in a
wall. It’s just to the west of the dome. Inside you’ll find six – six! –
gold bars. You can sell all of these to the local fence for $500
apiece. Holy moly.
Red Dead Redemption 2: Poisonous Trail Treasure Hunt guide and location
We hope you’ve got a lantern. You’re going to need it.
To begin the Poisonous Trail Treasure Hunt in Red Dead Redemption 2, you first need to start the Gunslinger’s side quest, The Noblest of Men, and a Woman.
It’s a particularly rich side quest, as it gives the player a bunch of new and unique weapons, but it also introduces you to Flaco Hernandez, who hides out in the hut at Cairn Lake, in The Grizzlies. Once Flaco is dead, search his cabin to find the Poisonous Trail map. The Poisonous Trail Treasure Hunt
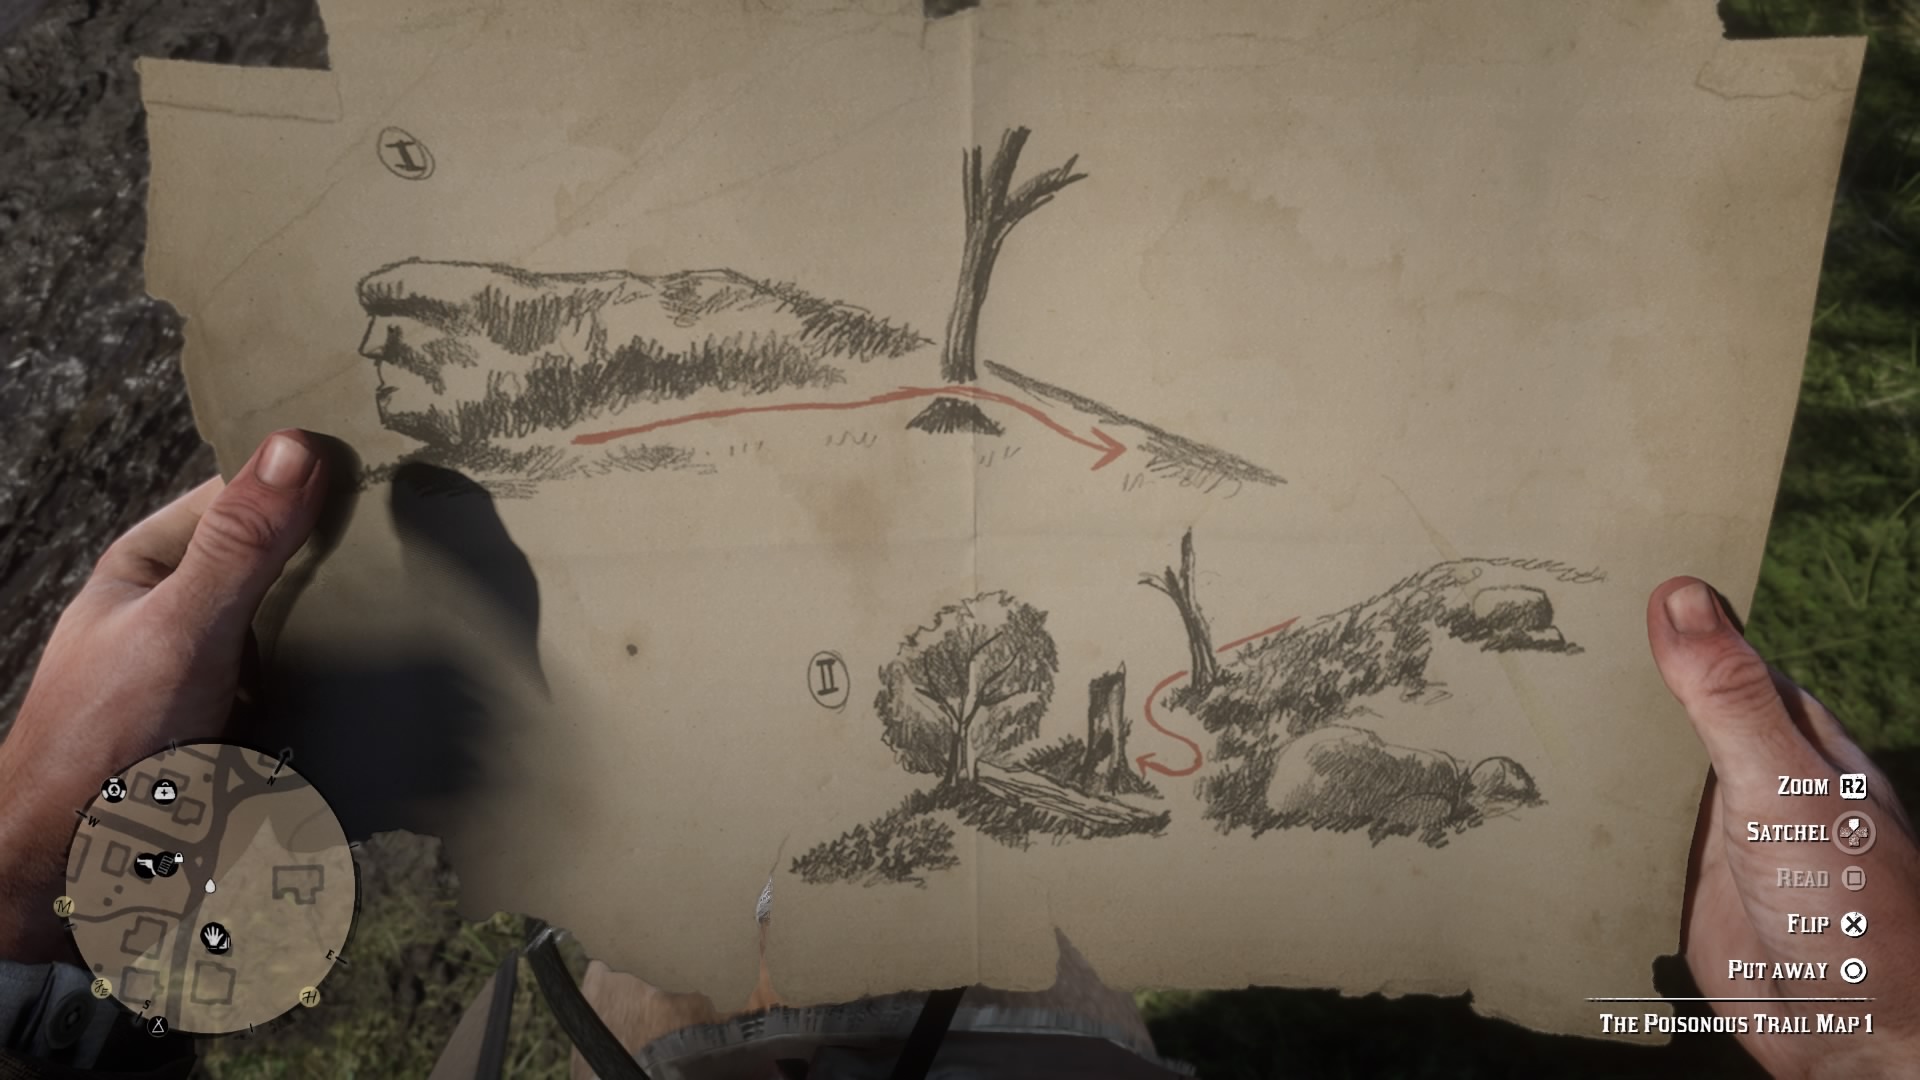
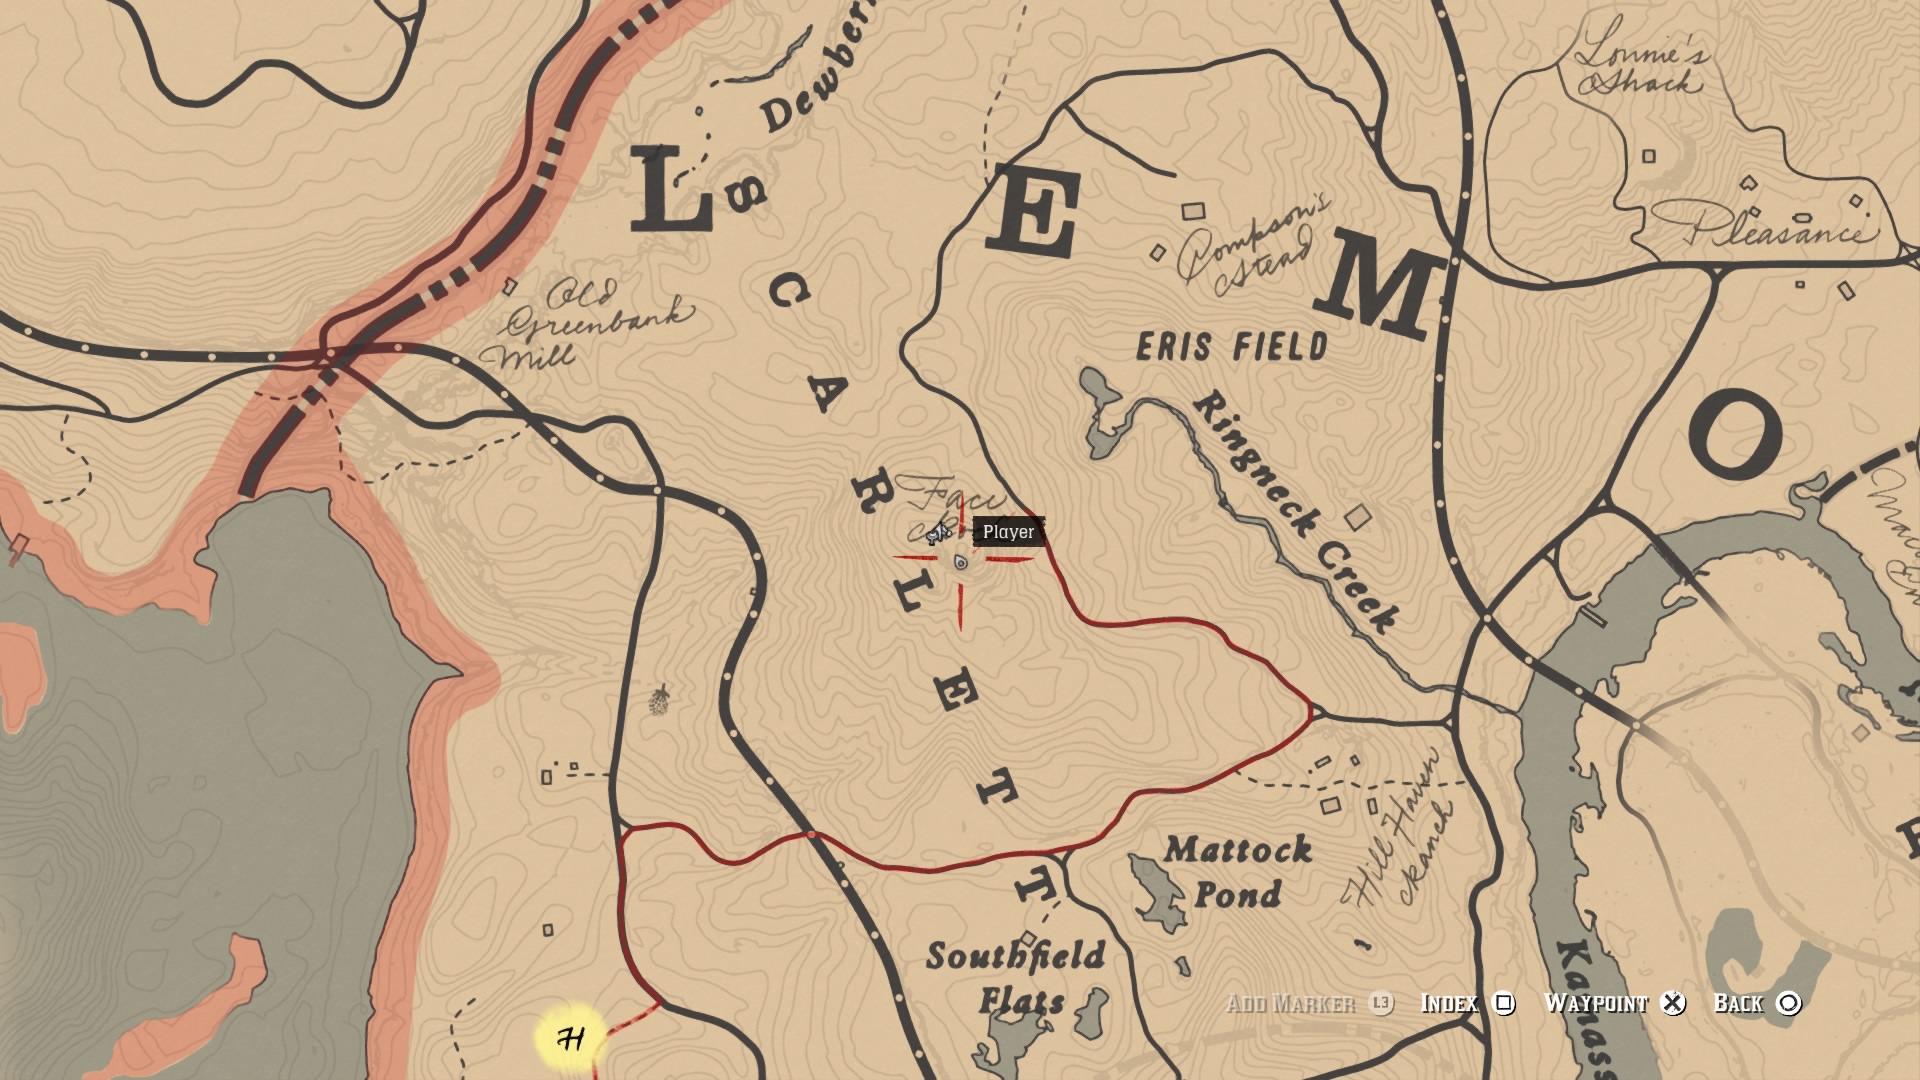
Now you’ve got that, examine the map and you’ll see the rocks resemble a face. That’s why it’s known as Face Rock, and you can find it on your map just west of Ringneck Creek. Find the hollow tree here, and you’ll be able to get the second map from inside of it.
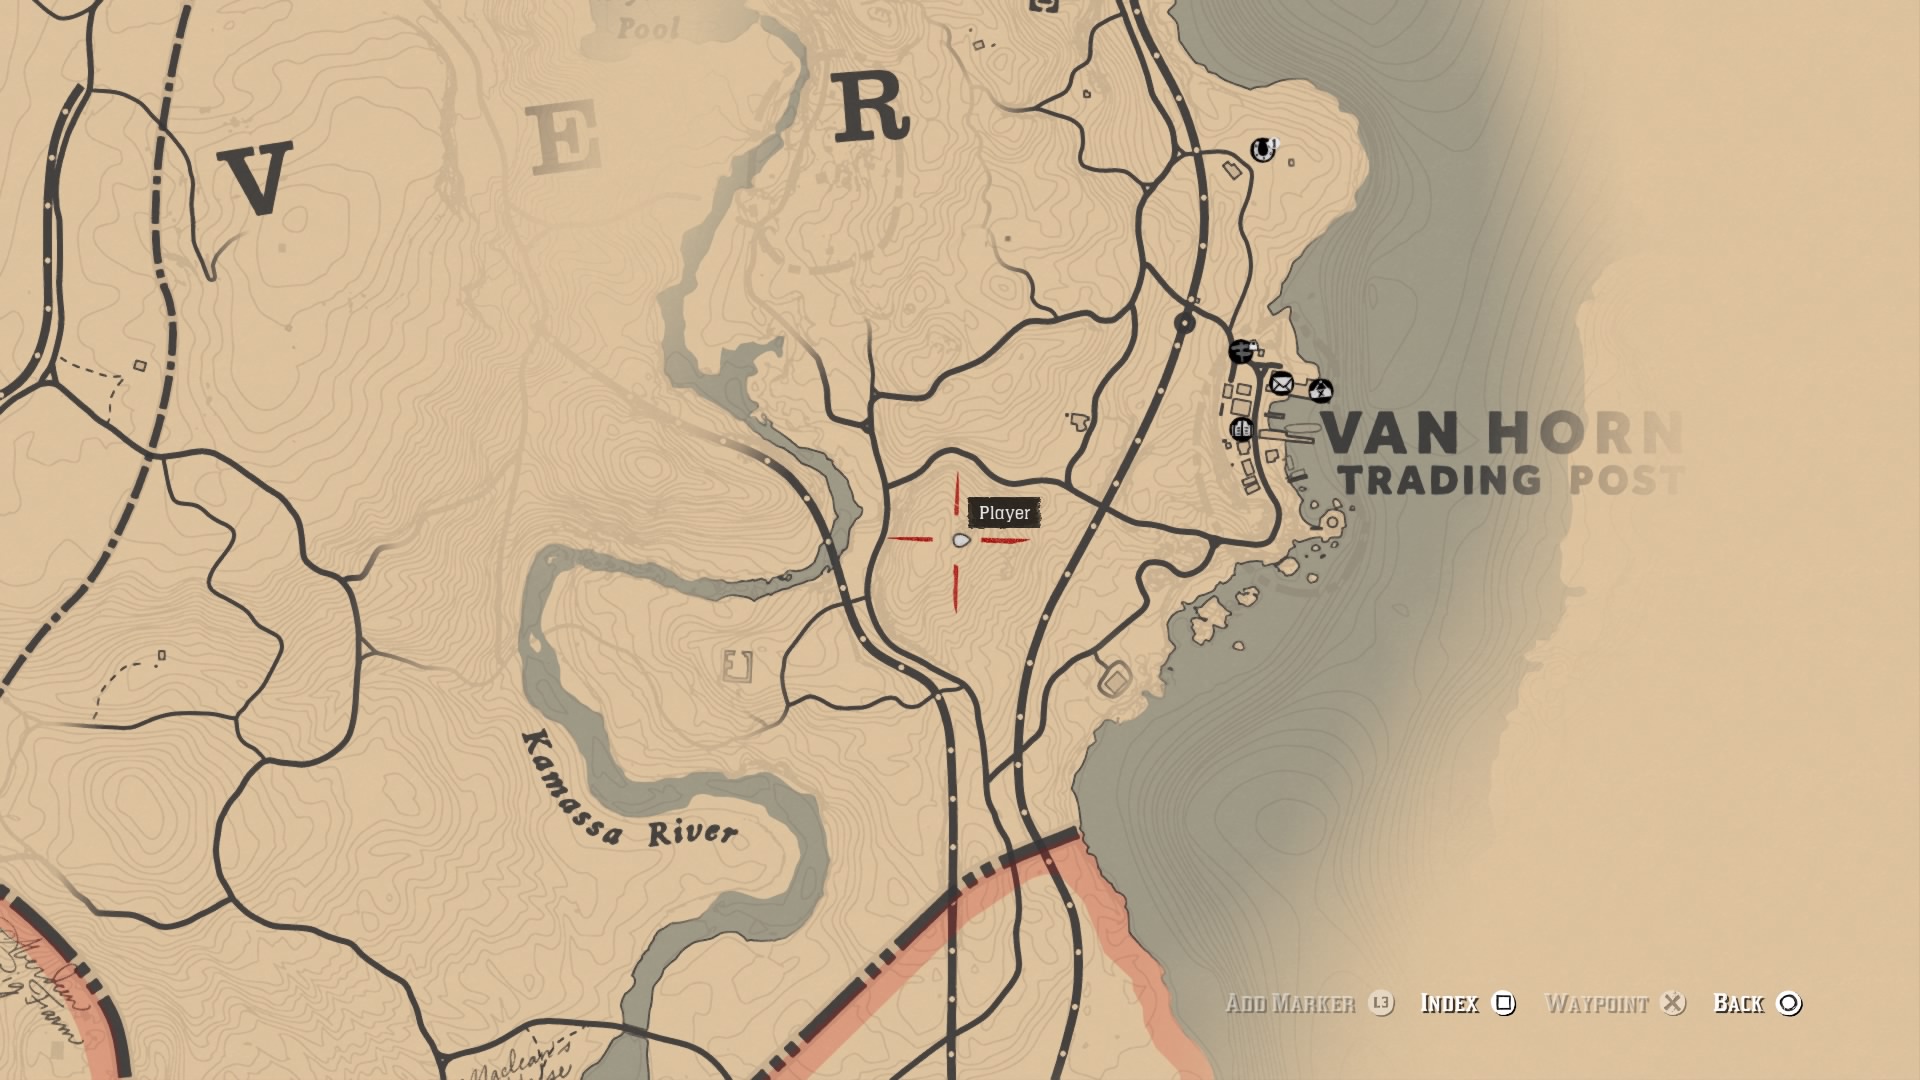
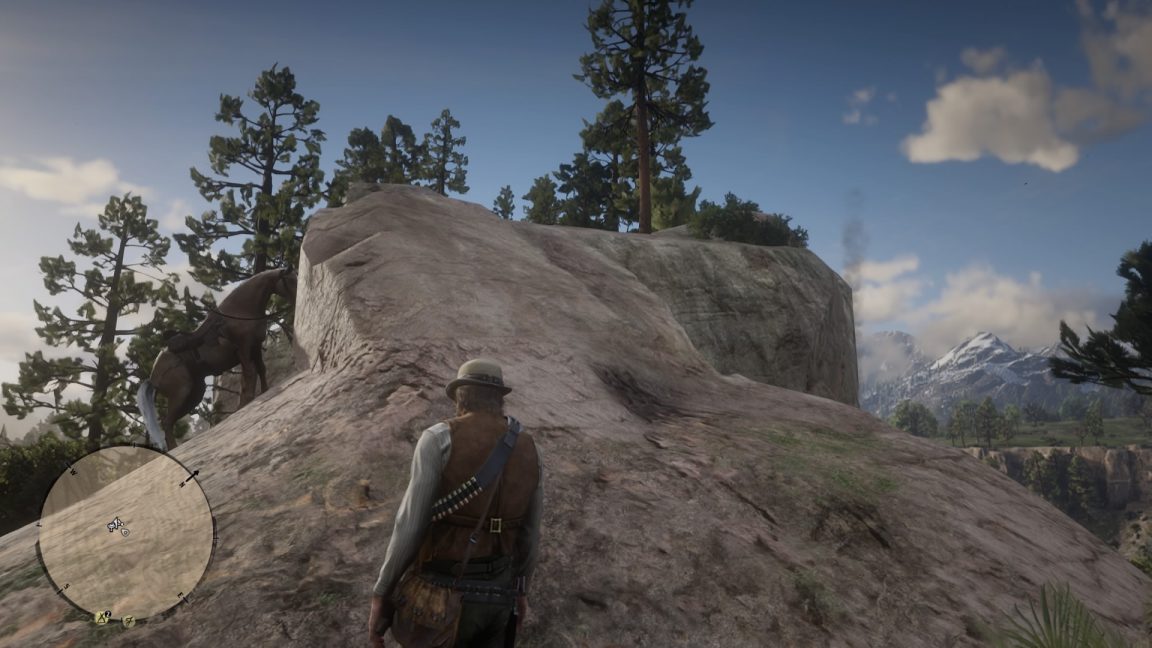
Looking at this map the drawing kind of looks like a snake, right? It
doesn’t seem to be marked on the map, but it’s a mound directly west of
the trading post Van Horn, on top of a steep hill.
Once you get there, poke around the stones that look like a nest of
snake eggs to find the next treasure map.
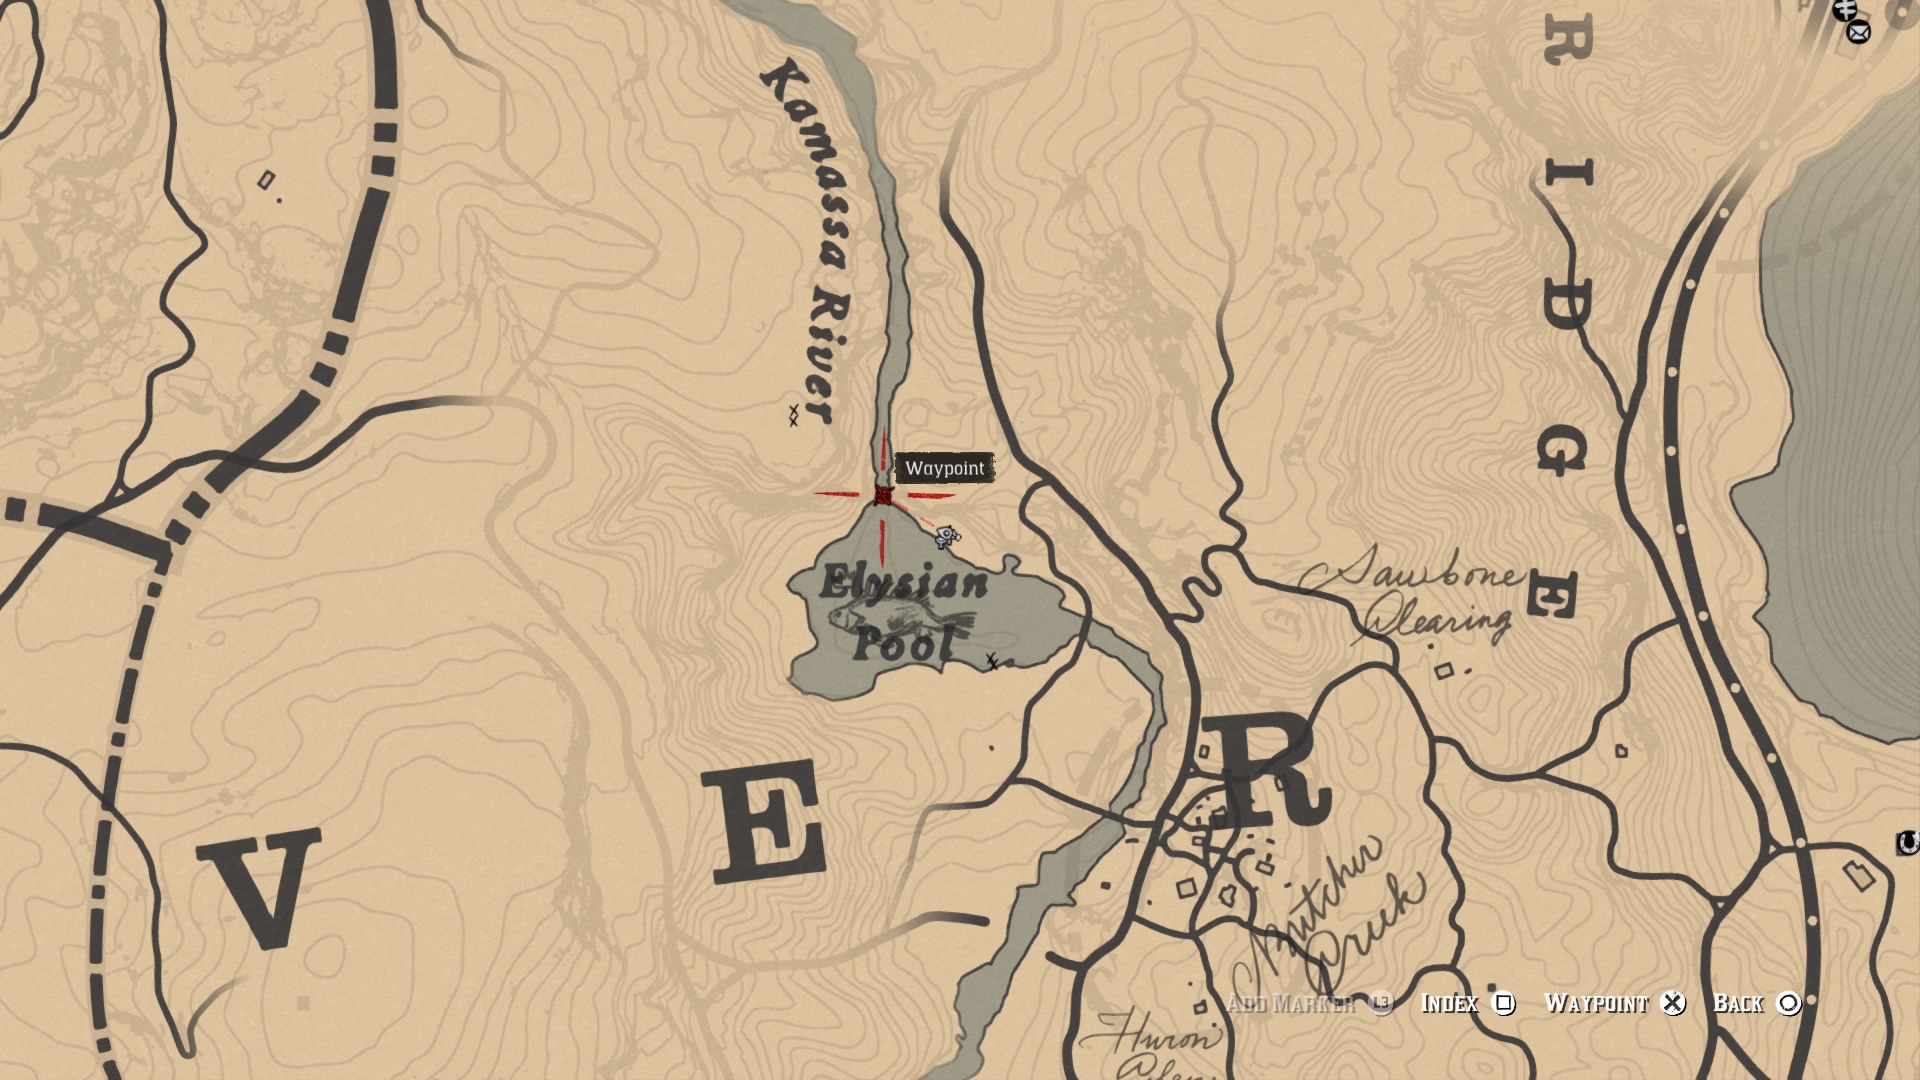
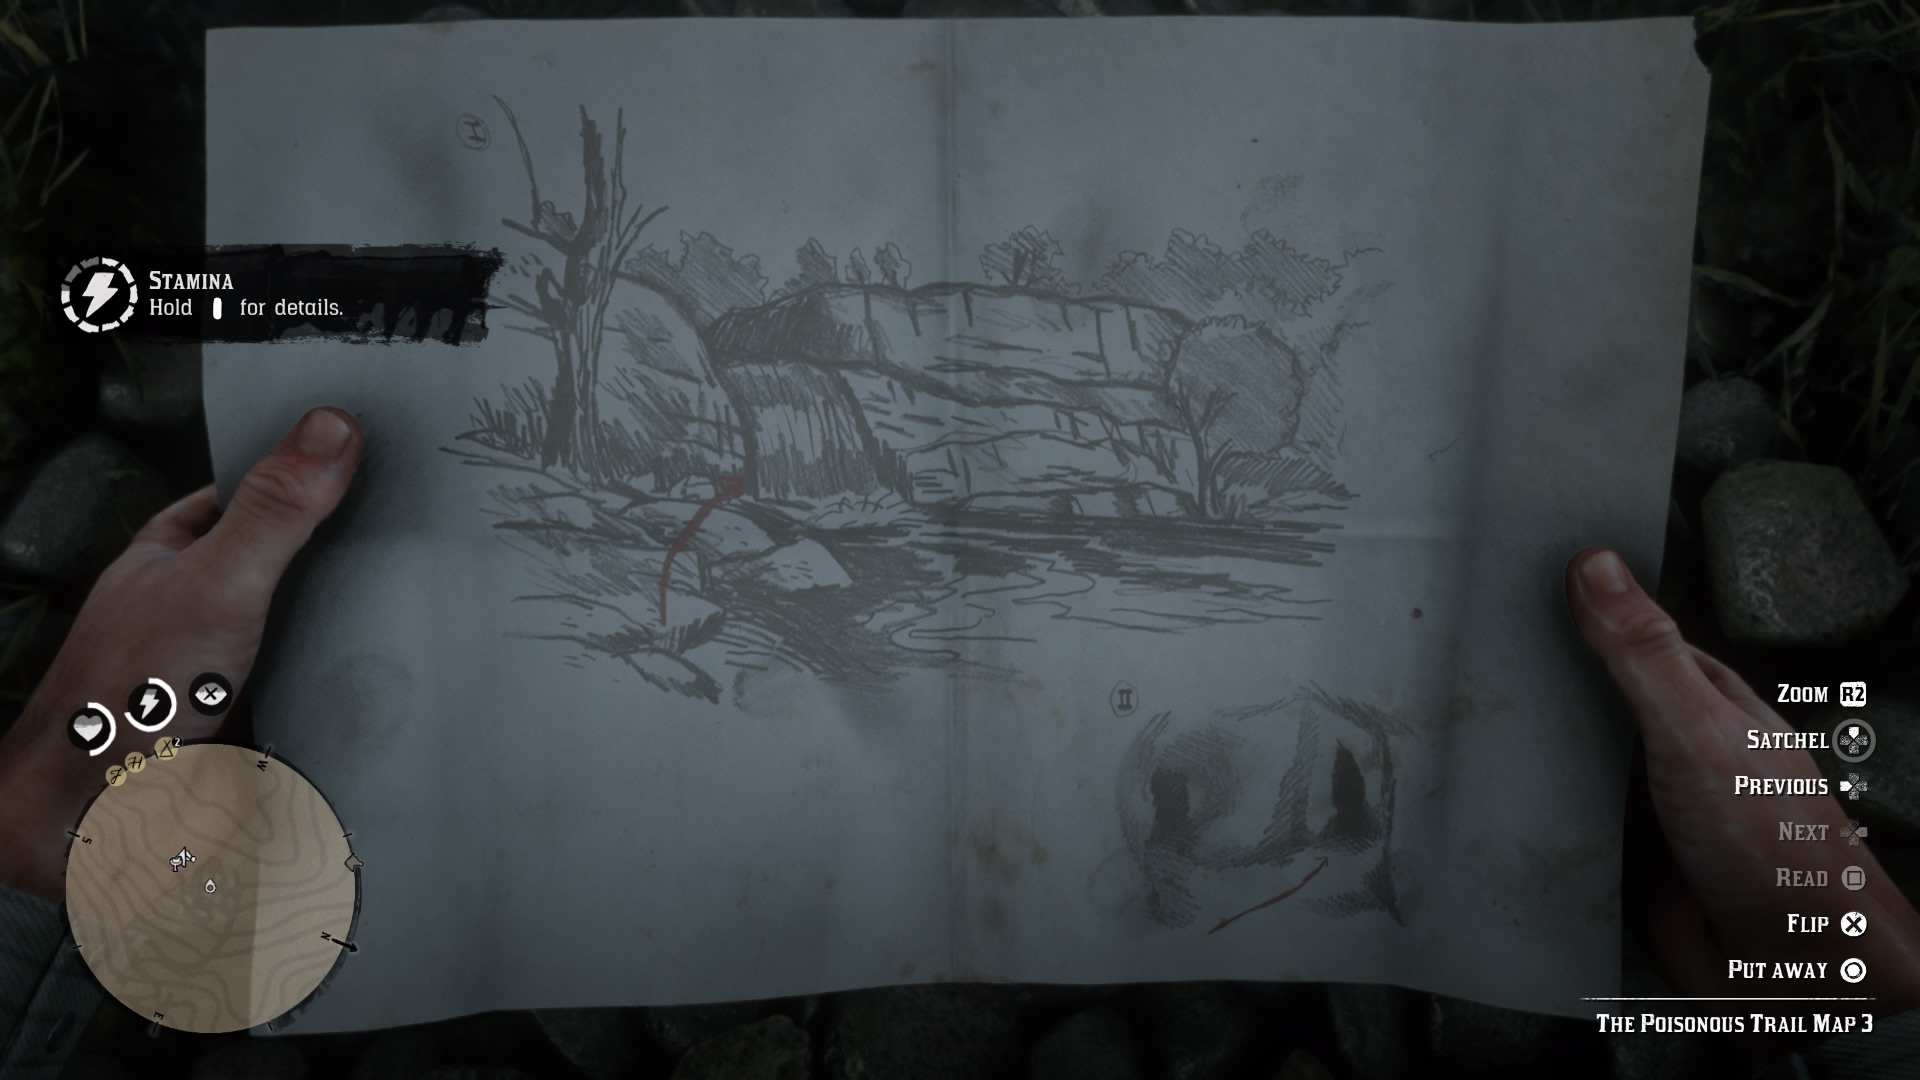
The third and final map shows a waterfall and you want to head to Elysian Pool,
north west of Van Horn. It’s not too far to travel. This is also the
spot for a Legendary Animal so bring your fishing rod and you can bag
that challenge as well.
Note: This is the same secret cavern you’ll enter to find the final reward for the Dreamcatcher challenge – but you will take a completely different route through the chambers.
Walk through the waterfall to find a secret chamber and light your
lantern otherwise you won’t be able to see a thing. climb up over the
first ledge and once you drop down the steep drop look for another steep
path branching off to the right and head down it. If you come to a
massive chamber with natural light breaking through you’ve gone too far
sop head back.
You’ll come to a small triangular tunnel entrance that you have to
crouch to go through. Take the right hand path at this fork on the other
side. Once this chamber opens up, stand, and look to your left. You’ll
see a ledge that you need to run and jump off. You’ll actually land
below it, and then you can climb up one last ledge and search a boulder
to find 4 gold bars worth $500 each when sold to a fence.
To get out of the chambers, head back to the last junction where you
went right, but take the left hand path. Or, if you die, you’ll spawn
back outside the cavern.
Red Dead Redemption 2: Jack Hall Gang treasure map guide and location
One of the first treasure maps you can find in Red Dead Redemption 2
leads to a decent prize, but you’ll have some trekking to do to find it.
As with all treasure maps in Red Dead Redemption 2, this one comes in
multiple parts. You’ll have to pair up the sketches on the treasure map
with the locations and conduct a thorough search, but the rewards are
usually worth it. It helps if you’ve got fast travel unlocked.
It appears that if you encounter Maximo and don’t buy the treasure
map, or kill him and don’t loot if from his body, you should be able to
buy it from a fence later in the game.
Jack Hall Gang Treasure Map
On the cliff overlooking the Dakota River just west of Flatneck Station
you’ll find a chap called Maximo, who’s about to go off exploring. Get
the treasure map off him for $10 (or rob him of it) and you’ll be able
to embark on the first part of this treasure hunt.
The first map depicts Caliban’s Seat, which is just south of Valentine.
Once you ride up you’ll see a ridge to the east of it, where you’ll
have to leave your horse. At the top, looking towards Valentine you’ll
find a path that slopes down to the right.
Follow this, jumping across ledges and clambering until it looks like
you can’t go any further. It’s here you’ll be able to search and find
the second part of this map, along with a pearl necklace.
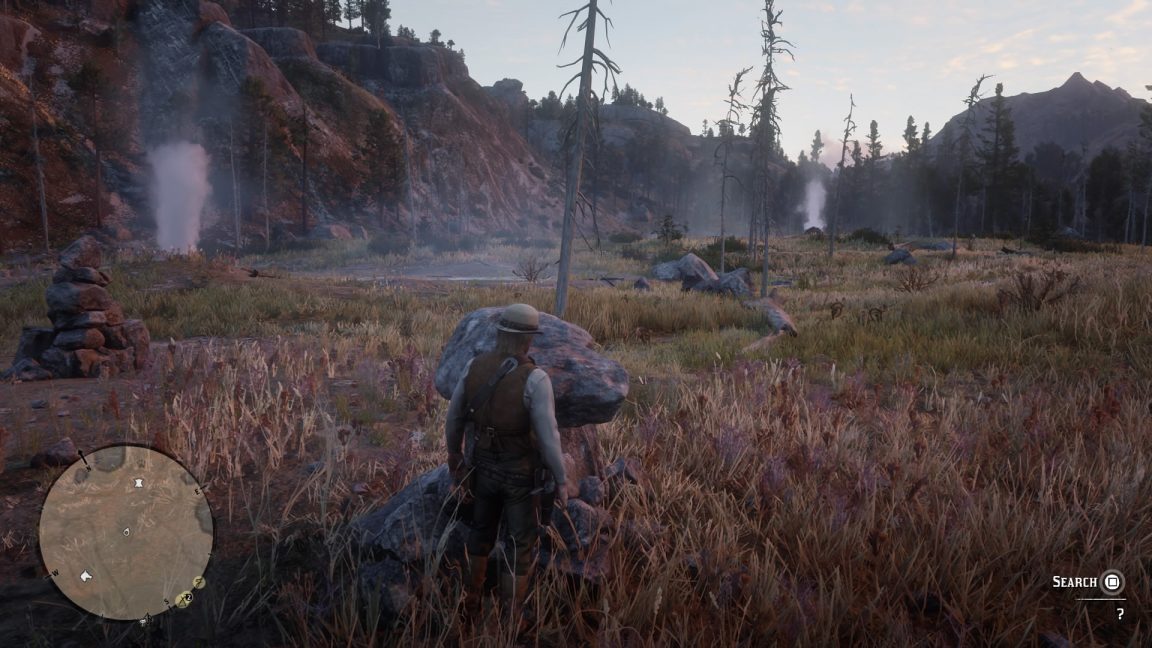
The second map depicts what looks like a circle and some steaming rocks. It’s actually Cotorra Springs, which you’ll find in the north of the map, north of Fort Wallace. If you take the train from Valentine you can get off at New Handover, Bacchus Station. Then it’s just short ride along the tracks.
Once you get to Cotorra Springs, position yourself at the bottom pile
of rocks, so you have a geyser to your north, northeast and northwest.
At the pile of rocks you’ll find the third Jack Hall Treasure map.
There’s also a Legendary Animal to hunt here if you feel like facing off against a wolf. You may as well while you’re here.
You now have the third Jack Hall Gang Treasure Map. You’ll now need to head to the east Grizzlies and specifically O’Creagh’s Run.
There’s an island in the middle lake here and you’re searching on the
south of it, underneath a rock. It’s here you’ll finally find 2 Gold Bars that are worth a lot of money. Take them to a fence and he’ll buy them for $500 apiece.
While you’re here, you should go salmon fishing to stock up on food, because the lake is absolutely teeming with fish.
If you’re looking for an even bigger payout, follow these walkthroughs for the Poisonous Trail Treasure Map, the Strange Statue treasure quest and the Le Tresor Des Morts treasure map.
Red Dead Redemption 2 Strange Statues quest – how to solve the Strange Statues puzzle
Looking to get some easy gold bars in Red Dead Redemption 2? Here’s the quickest way to strike it rich.
To the Northwest of Fort Wallace, beneath the Granite Pass, there’s a
place called Window Rock. Make your way up the mountain pass there and
you should find some cave paintings marked ‘Strange Statues’.
Allow Arthur to note them down in his book, take a first-person
screenshot for your own records, then head Northeast and cross the
river, just South of the ‘I’ in ‘AMBARINO’.
There you will find a crevice in the granite, enterable from the
West, that leads to a cave. Inside, you will find another point of
interest for Arthur to mark down, also titled ‘Strange Statues’.
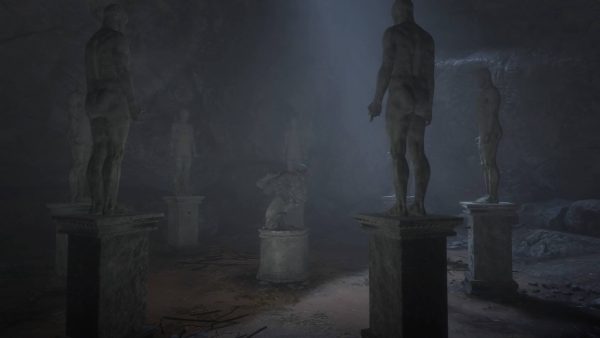
There are seven statues in this room and your job is to count the
fingers on each. Initially, it seems like the answer is: 2, 4, 5, 8, 3,
4, 6. However, one of the statues with 4 fingers is missing an arm,
which you can find on the floor in the cave. The arm has three fingers.
The clue for this is on the painting you discovered earlier, which
shows the numbers 2, 7, 5, 8, 3, 4, 6. This is the correct sequence.
So, what do you do with this information? The idea is to press the
buttons on the statues with prime numbers – that’s 2, 3, 5, and 7.
Head around the room and press the buttons in for the prime number
statues and the statue in the middle of the room should open up,
offering you three gold bars for your trouble.
If you happen to make a mistake at any point, you can pop around to
the back of a statue and press the button again to reset it.
Now all that’s left is for you to sell your gold bars and figure out how to spend your newfound wealth.