Red Dead Redemption 2: Jack Hall Gang treasure map guide and location
One of the first treasure maps you can find in Red Dead Redemption 2
leads to a decent prize, but you’ll have some trekking to do to find it.
As with all treasure maps in Red Dead Redemption 2, this one comes in
multiple parts. You’ll have to pair up the sketches on the treasure map
with the locations and conduct a thorough search, but the rewards are
usually worth it. It helps if you’ve got fast travel unlocked.
It appears that if you encounter Maximo and don’t buy the treasure
map, or kill him and don’t loot if from his body, you should be able to
buy it from a fence later in the game.
Jack Hall Gang Treasure Map
On the cliff overlooking the Dakota River just west of Flatneck Station
you’ll find a chap called Maximo, who’s about to go off exploring. Get
the treasure map off him for $10 (or rob him of it) and you’ll be able
to embark on the first part of this treasure hunt.
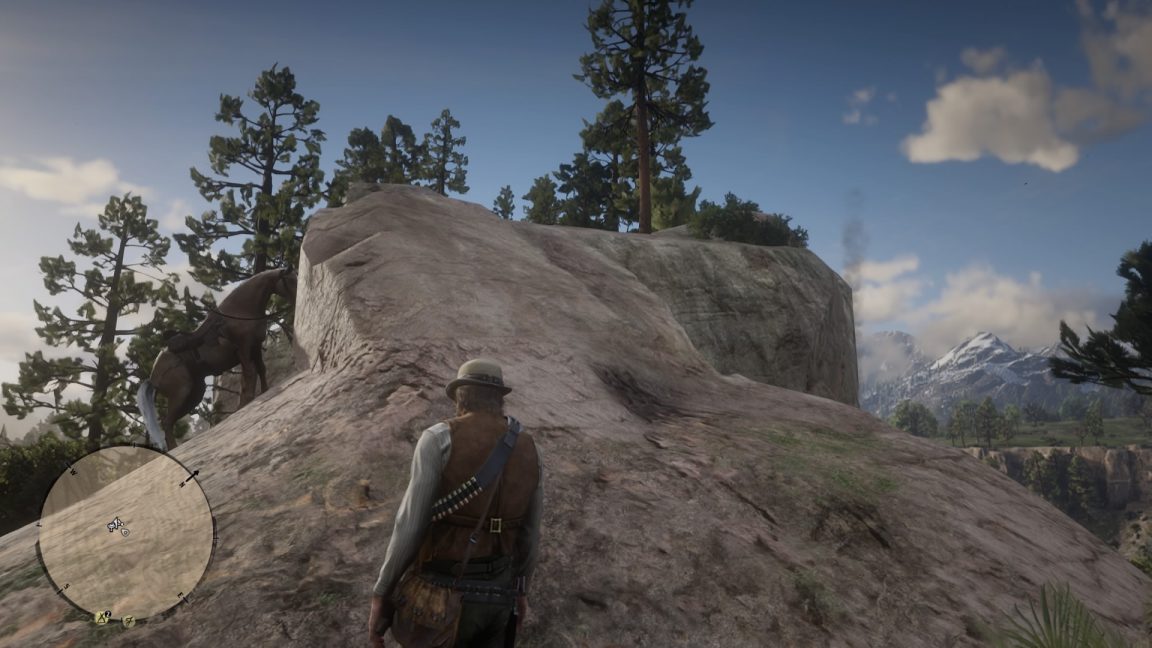
The first map depicts Caliban’s Seat, which is just south of Valentine.
Once you ride up you’ll see a ridge to the east of it, where you’ll
have to leave your horse. At the top, looking towards Valentine you’ll
find a path that slopes down to the right.
Follow this, jumping across ledges and clambering until it looks like
you can’t go any further. It’s here you’ll be able to search and find
the second part of this map, along with a pearl necklace.
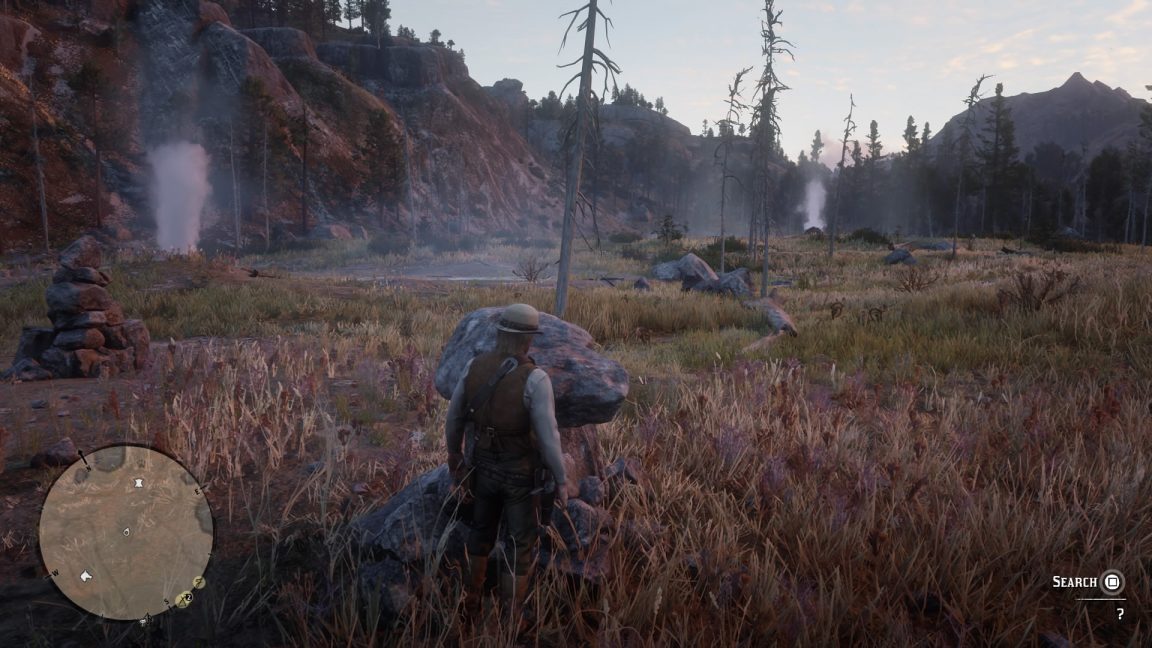
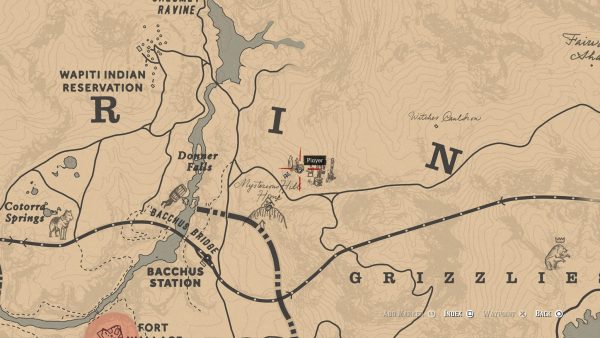
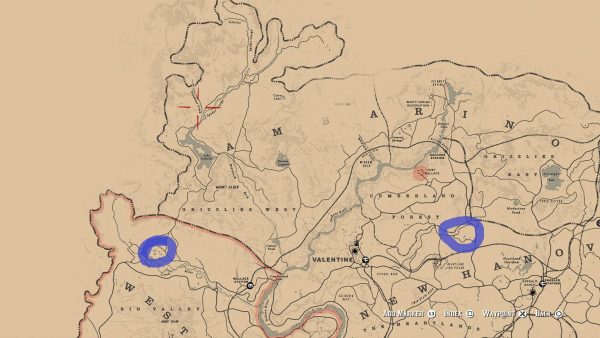
The second map depicts what looks like a circle and some steaming rocks. It’s actually Cotorra Springs, which you’ll find in the north of the map, north of Fort Wallace. If you take the train from Valentine you can get off at New Handover, Bacchus Station. Then it’s just short ride along the tracks.
Once you get to Cotorra Springs, position yourself at the bottom pile
of rocks, so you have a geyser to your north, northeast and northwest.
At the pile of rocks you’ll find the third Jack Hall Treasure map.
There’s also a Legendary Animal to hunt here if you feel like facing off against a wolf. You may as well while you’re here.
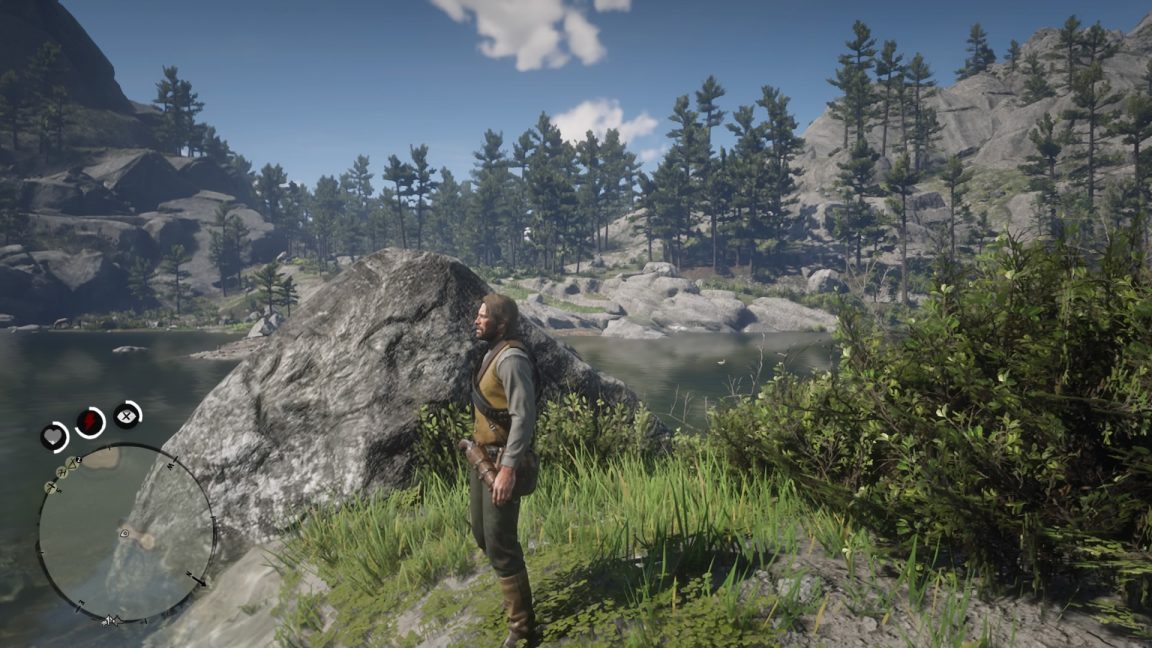
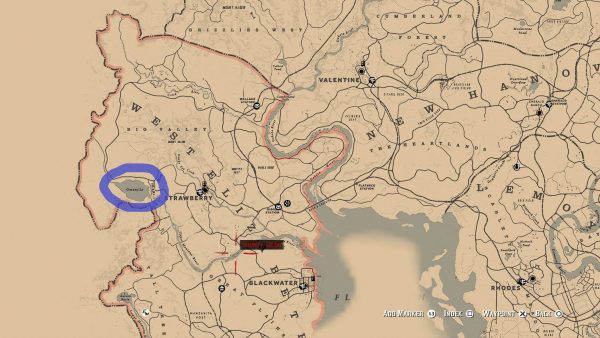
You now have the third Jack Hall Gang Treasure Map. You’ll now need to head to the east Grizzlies and specifically O’Creagh’s Run.
There’s an island in the middle lake here and you’re searching on the
south of it, underneath a rock. It’s here you’ll finally find 2 Gold Bars that are worth a lot of money. Take them to a fence and he’ll buy them for $500 apiece.
While you’re here, you should go salmon fishing to stock up on food, because the lake is absolutely teeming with fish.
If you’re looking for an even bigger payout, follow these walkthroughs for the Poisonous Trail Treasure Map, the Strange Statue treasure quest and the Le Tresor Des Morts treasure map.
Red Dead Redemption 2 Strange Statues quest – how to solve the Strange Statues puzzle
Looking to get some easy gold bars in Red Dead Redemption 2? Here’s the quickest way to strike it rich.
To the Northwest of Fort Wallace, beneath the Granite Pass, there’s a
place called Window Rock. Make your way up the mountain pass there and
you should find some cave paintings marked ‘Strange Statues’.
Allow Arthur to note them down in his book, take a first-person
screenshot for your own records, then head Northeast and cross the
river, just South of the ‘I’ in ‘AMBARINO’.
There you will find a crevice in the granite, enterable from the
West, that leads to a cave. Inside, you will find another point of
interest for Arthur to mark down, also titled ‘Strange Statues’.
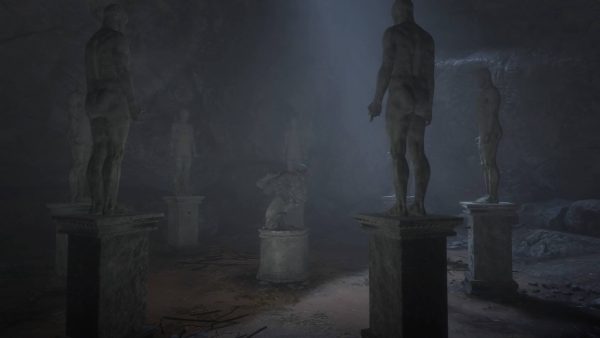
There are seven statues in this room and your job is to count the
fingers on each. Initially, it seems like the answer is: 2, 4, 5, 8, 3,
4, 6. However, one of the statues with 4 fingers is missing an arm,
which you can find on the floor in the cave. The arm has three fingers.
The clue for this is on the painting you discovered earlier, which
shows the numbers 2, 7, 5, 8, 3, 4, 6. This is the correct sequence.
So, what do you do with this information? The idea is to press the
buttons on the statues with prime numbers – that’s 2, 3, 5, and 7.
Head around the room and press the buttons in for the prime number
statues and the statue in the middle of the room should open up,
offering you three gold bars for your trouble.
If you happen to make a mistake at any point, you can pop around to
the back of a statue and press the button again to reset it.
Now all that’s left is for you to sell your gold bars and figure out how to spend your newfound wealth.
Red Dead Redemption 2 Honor System: how does it work, honor ranks, rewards and unlocks
The Honor System in Red Dead Redemption 2 plays a significant role in your progress, even though it’s not immediately obvious.
It’s not always apparent why things are happening, but this system
runs under the surface throughout the whole game, and it’s important to
understand it and how it affects your particular play style.
Red Dead Redemption 2’s Honor System is the difference between good
and bad – how you’re treated by other characters in-game, whether they
attack you, respect you, or run in fear, whether you’ll receive
discounts on things that you buy around town, help and advice from folk,
new outfits, or an ambush to the kidneys.
How does the Honor System work?
Put simply, if you do good, such as help citizens that are stranded
or being beaten up, your Honor will go up. If you steal, murder
innocents, or generally become a nuisance, your Honor will drop.
Wondering why that old fella gave you some abuse, or why the shop keeper
knocked a dollar of your new outfit? It’s because of your Honor Rank.
Honor Ranking and Rewards
Every time your Honor Ranking goes up or down you’ll receive an
in-game notification and a note if there’s a significant change. The
Honor Ranking is a scale from -8 to +8, with 0 as neutral. Not every
rank gives you bonuses, but be aware that if you’re Honor Rank -6 you’ve
got a long way to go before you can get back in people’s good books.
Generally speaking, having high Honor will get you the discounts and
outfits to unlock, but being bad also pays a little if you’re fan of
booze and smoking – and Dead-Eye shortcuts.
Here’s what changes as you move up or down the Honor Rank scale:
Honor 7: You’ll get a whopping half price discount in all shops. If you’re going to be the good guy, it really pays off.
Honor 6: This unlocks the final set of outfits to
buy in stores; the Deuville, the Drifter, the Dewberry Creek, the
Farrier, the Faulkton, and the Gambler.
Honor 5: Reaching Honor 5 gives you 25% off at all stores in the game.
Honor 3: This will unlock a whole bunch of new
outfits: the Bulldogger, the Chevalier, the Corson, the Cumberland, the
Cowpuncher, the McLaughlin, the Roscoe, and the Valentine.
Honor 2: Your first round of discount at shops is 10% off.
Honor 1: When you loot bodies the drop rate is improved so you’ll find more tonics, jewelry and food.
Honor -1: When you loot dead bodies the drop rate
is increased for the following items; Dead-Eye tonic, thrown weapons,
alcohol and tobacco. There’s also a chance of more money and jewelry
from dead lawmen.
How to increase or decrease your Honor Rank
There are multiple actions that will increase or decrease your Honor Rank and we’ve listed a few here.
These relate to general actions in the world and not specific story
missions. Story missions all contribute to the Honor Rank too, but there
are too many to list. Just know that when you’re given a chance to help
or ignore a story character, or do them a favour (or not) your Honor
Rank is being adjusted accordingly. Actions that increase Honor
Donate cash or jewelry to the camp
Do chores around the camp
During a duel, disarm an opponent instead of killing them
Surrender peacefully to the law when Wanted
Pay off your bounties at the post office
Actions that decrease Honor
Stealing a horse
Beat someone up while intimidating them
Killing a farm animal like cows and pigs, or a dog
Hold up a shop – this is one of the biggest dishonorable actions
Randomly shoot near an innocent person
Kill an innocent person or kill a lawman
Killing a wild animal seems to be fine, but you have to skin it or stow its pelt
Fought The Law and The Law won? Here’s how to get rid of your bounty in Red Dead Redemption 2.
How to get rid of your bounty in Red Dead Redemption 2
The age of outlaws might be coming to an end as the west is tamed in
Red Dead Redemption 2, but Arthur Morgan and the rest of the van der
Linde gang are still rough and tough enough to tangle with the strong
arm of the law when push comes to shove.
The thing with being a wanted bank robber though, is that a fat price
on your head can make day-to-day life a bit of a chore. Commit enough
crimes and lawmen will start to try and track you down, which – if you
resist – just snowballs into a higher and higher reward for your
capture.
In the early game when money’s tight, it’s quite easy to run up a big
bounty that’s tough to pay off, especially considering the bounties you
can collect for murderers at the Valentine Sheriff’s office are less
than $100.
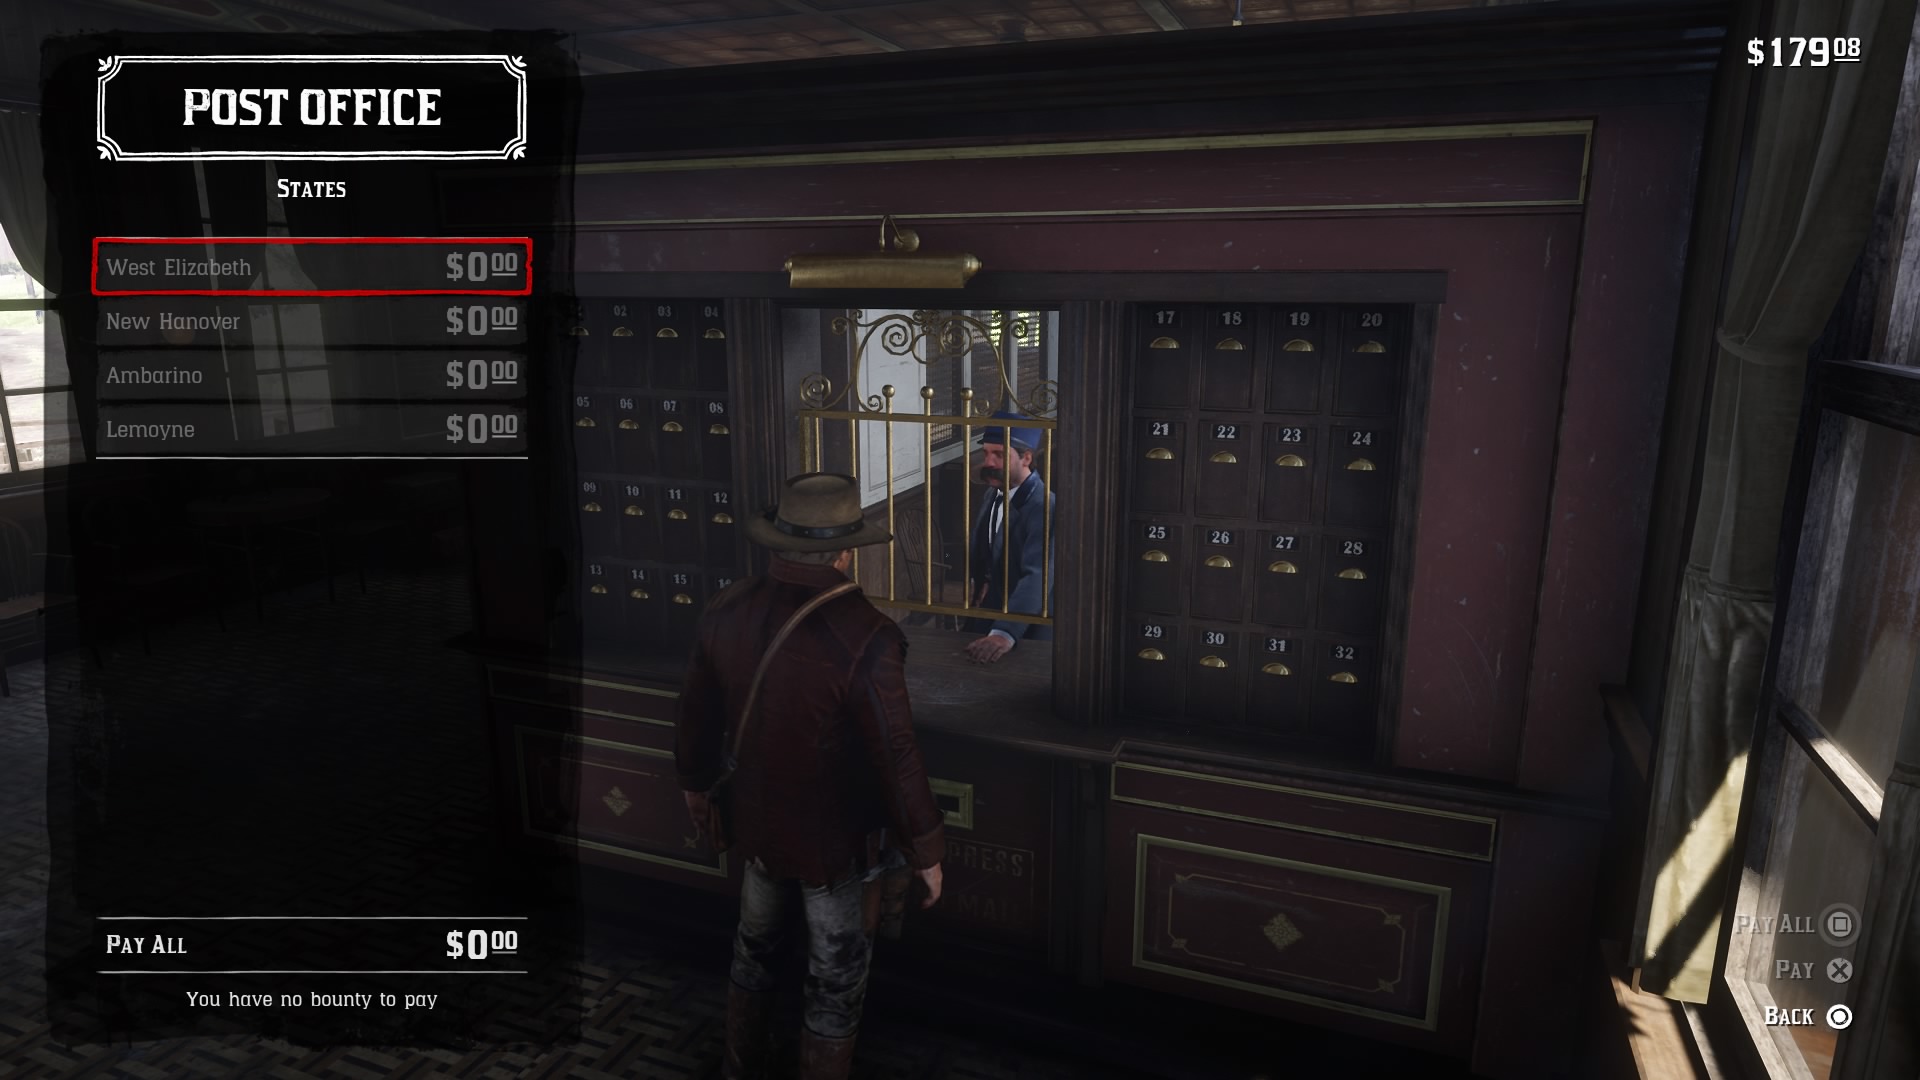
Removing your own bounty is quite simple though, if not very well communicated. All you need to do is visit a Post Office and speak to the Clerk behind the counter.
Here you’ll have the option to pay off your bounties. They’re divided
by county, so if you go on rampages across the country, then you’re
going to have to get rid of each one off individually.
In the early game, the easiest place to find a Post Office is in the southeast of Valentine.
Something to remember though, is that you can receive a bounty by
completing story missions – often quite large ones – so it’s often not
efficient to keep paying your bounties off as they appear, because
you’ll just get more as you progress naturally through the game.
How to surrender in Red Dead Redemption 2
Alternatively when the Sheriffs come a-knocking, you can give yourself up and surrender to serve your time in the cells.
To do this, you need to initiate a conversation with the
pursuing lawman like you would with any other character, by pressing the
left trigger to target them. You should then get a button prompt that
lets you surrender.
Make sure you’ve not got any weapons drawn when you try and do this,
or the situation might get messy. You can check out our guide to see
what happens if that bounty suddenly turns into a Wanted: Dead or alive matter and how it can affect the honour system in Red Dead Redemption 2.
What does Wanted Dead or Alive mean in Red Dead Redemption 2
Some areas of Red Dead Redemption 2’s huge map are
hotter than others, and we’re not talking about the sun. Being an
infamous criminal comes with its fair share of baggage, so here’s all you need to know about the “Wanted Dead or Alive” areas in Red Dead Redemption 2.
Wanted Dead or Alive Red Dead Redemption 2
You’ll most likely notice the ominously red “Wanted Dead or Alive” message around Javier Escuella’s second mission in Red Dead Redemption 2.
The game doesn’t really communicate to you what this means, but
you’ll find it on some other areas by default, as well as because of
your actions in and out of main missions. Basically, in areas marked with “Wanted Dead or Alive” NPCs
will be actively hostile to your presence since you’re so well known as a
wrong’un.
This is why at the start of the game it’s active around Blackwater –
because of the robbery gone wrong – and will trigger in other places
based on the outcome of some quests.
There are also reports that you can cause it to happen by committing a
large amount of serious crimes in quick succession. Then when you
return to the area, everyone will be hostile.
These areas are essentially locked out to you, unless you visit them
during a quest. Military encampments and police strongholds are also off
limits and behave in the same way – including places like Fort Wallace
and the Penitentiary.
Special locations like this are separate from the bounty system, so
for instance, you can’t pay off your Blackwater bounty in Chapter 2.
For more on how crime and punishment works in Red Dead Redemption 2,
or if you’re struggling with the law, take a look at our guide on how to get rid of your bounty. You can also check out our guide to see how bounties will affect the honour system.
Red Dead Redemption 2 hunting guide – animal locations, ammo types, legendary animals, and tactics
Red Dead Redemption 2’s hunting mechanics are more in-depth than they are in most dedicated hunting games.
The hundreds of species, the different ammo types, the different
weapons, the tactics and equipment make it incredibly involved. It’s
easy to get overwhelmed. But don’t worry, we’re here to walk you through
it, to guide to you the right spots, and to help you bag perfect pelts.
Red Dead Redemption 2 hunting guide
Hunting is mainly useful for three things: meat, pelts, and crafting
items. If you want to keep your health core high, wear the best clothes,
and craft the best ammo, hunting is your bread and butter. Here are
just some of the things you can do with hunting goods:
Setting up a campfire and cooking meat is one of the easiest ways to keep Arthur working at maximum capacity
Animal parts can be used by a campfire to craft, such as animal fat for explosives and feathers for special arrow types
Carcasses and animal parts can be donated to Pearson at camp, both as contributions and to unlock upgrades
Animal carcasses and parts can be sold to butchers for profit
You can use certain body parts to craft Talismans at fences, permanently boosting your stats
Skinning animals works towards your Master Hunter challenges and towards Red Dead Redemption 2’s best outfit
Red Dead Redemption 2 hunting tips
First off, you should avoid going for animals under three
star-quality where you can help it. When you spot your prey at a
distance – make sure you stay downwind so they don’t pick up your scent,
visible in Eagle Eye mode – pull out your binoculars. Study the animal
and it should give you a star rating on their pelt. Three stars –
Pristine – is what you want.
As our Red Dead Redemption 2 pelt guide
points out, you then need to use the correct ammunition on the animal
to keep the pelt at high quality. You also need to go for kill shots,
rather than repeatedly firing at them.
Red Dead Redemption 2 – how to get clean hunting kills
As mentioned above, the quality of your kill is about using the right
ammunition (which you can check in the compendium), as well as making a
clean kill. All animals have kill spots that you can target for an
instant kill. These areas are highlighted in red once you reach Level 4
of Dead Eye.
Unlocked in Chapter 5, this Dead Eye upgrade makes your reticle turn
red when close to a vital organ such as the brain or the heart. Hit
these small targets for an instant kill. Be aware that you also have to
account for penetration, though – animals with thick skulls, for
example, can only be taken down instantly with high velocity cartridges
and powerful rifles.
Red Dead Redemption 2 animal locations and habitats
So, you now know exactly what to do with each animal you encounter.
The only problem is, where do you find the buggers? Here I’ll break down
animal habitats for you so you can head off to bag your trophies.
I’m not going to list every animal in the game because I will be dead
before I’ve finished. Some of the animals can be found across large
portions of the map anyway – those damn badgers are everywhere. Instead,
I’ll list some of the hardest animals to track down. Bat locations
Need some bat wings or stringy meat? Here’s where to look: Armadillo, iguana and gila monster locations
If you want armadillo skin, you’re going to need to ride past
Blackwater and into New Austin. Appropriately, these are all around the
outskirts of the town of Armadillo. You can also find gila monsters and
iguana around here: Beaver locations
Whether you want scent glands, or beaver fur, these little critters
can be tough to track down. You will find a patch of them West of
Strawberry, around a lake. You can also find some under the ‘E’ and ‘R’
of ‘NEW HANOVER’. Here’s a look: Bull locations
As far as I know, there are two spots for bulls. If you want bull horns, prime beef, or pelts, here’s where you need to go: Condor locations
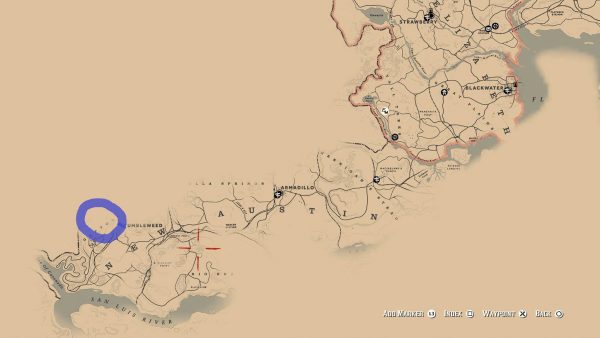
If you need condor feathers, there’s only one place to get them and it’s just to the West of Tumbleweed in New Austin: Crab locations
These are tricky to track down as well, but here’s where you can find some crustacean meat: Waxwing locations
These small birds can be difficult to track down, so head to these locations to get those cedar waxwing feathers:
For other animal species, just use a bit of common sense. Pigeons
scavenge in Saint Denis, gulls are by the coast, farm animals are in
farms, and amphibians are by lakes and rivers.
The bayou North of Saint Denis features its own habitat and hosts
species such as bullfrog, alligators, cranes, egrets, and turtles. New
Austin is home to desert-dwelling animals.
Red Dead Redemption 2 Legendary Animal locations
Looking for the best pelts for the trapper? Here are the legendary animal locations in Red Dead Redemption 2.
Legendary Fox – North of the fence in Rhodes
Legendary Bullgator – West of Lakay in the Bayou
Legendary Elk – East of Bacchus Station, North of Fort Wallace
Legendary Cougar – West of Tumbleweed, in Gaptooth Ridge
Legendary Coyote – Northwest of Rhodes, in Scarlett Meadows
Legendary Wolf – West of Bacchus Bridge, Cotorra Springs
Legendary Buck – Northwest of Strawberry
Legendary Boar – North of Lagras, Bluewater Marsh
Legendary Beaver – Southwest of Butcher Creek
Legendary Bharati Grizzly Bear – North of O’Creagh’s Run, Grizzlies East
Legendary White Bison – West end of the Grizzlies, Lake Isabella
Legendary Giaguaro Panther – West of Shady Belle, Lemoyne (only available after completing Rank 9 in the Master Hunter challenge)
Legendary Tatanka Bison – Southeast of MacFarlane’s Ranch, Hennigan’s Stead
Legendary Moose – Northeast edge of the map, Roanoke Ridge
Legendary Bighorn Ram – West of Valentine, Cattail Pond
Legendary Pronghorn – East of Fort Mercer, Rio Del Lobo Rock
Red Dead Redemption 2 Pelts Guide – How to get perfect pelts, where to sell and store them
Trade in fur and animal pelts was a cornerstone of the frontier
economy all the way from the sixteenth century to the start of the
twentieth.
So, with such fastidious attention to detail, it’s no surprise that
this trade also plays an important role in Arthur Morgan’s journey
throughout Red Dead Redemption 2 as well. Here’s what to do with pelts in Red Dead Redemption 2, including where to store them, where to sell them, and how to get perfect pelts.
What to do with pelts and where to to store animal pelts in Red Dead Redemption 2
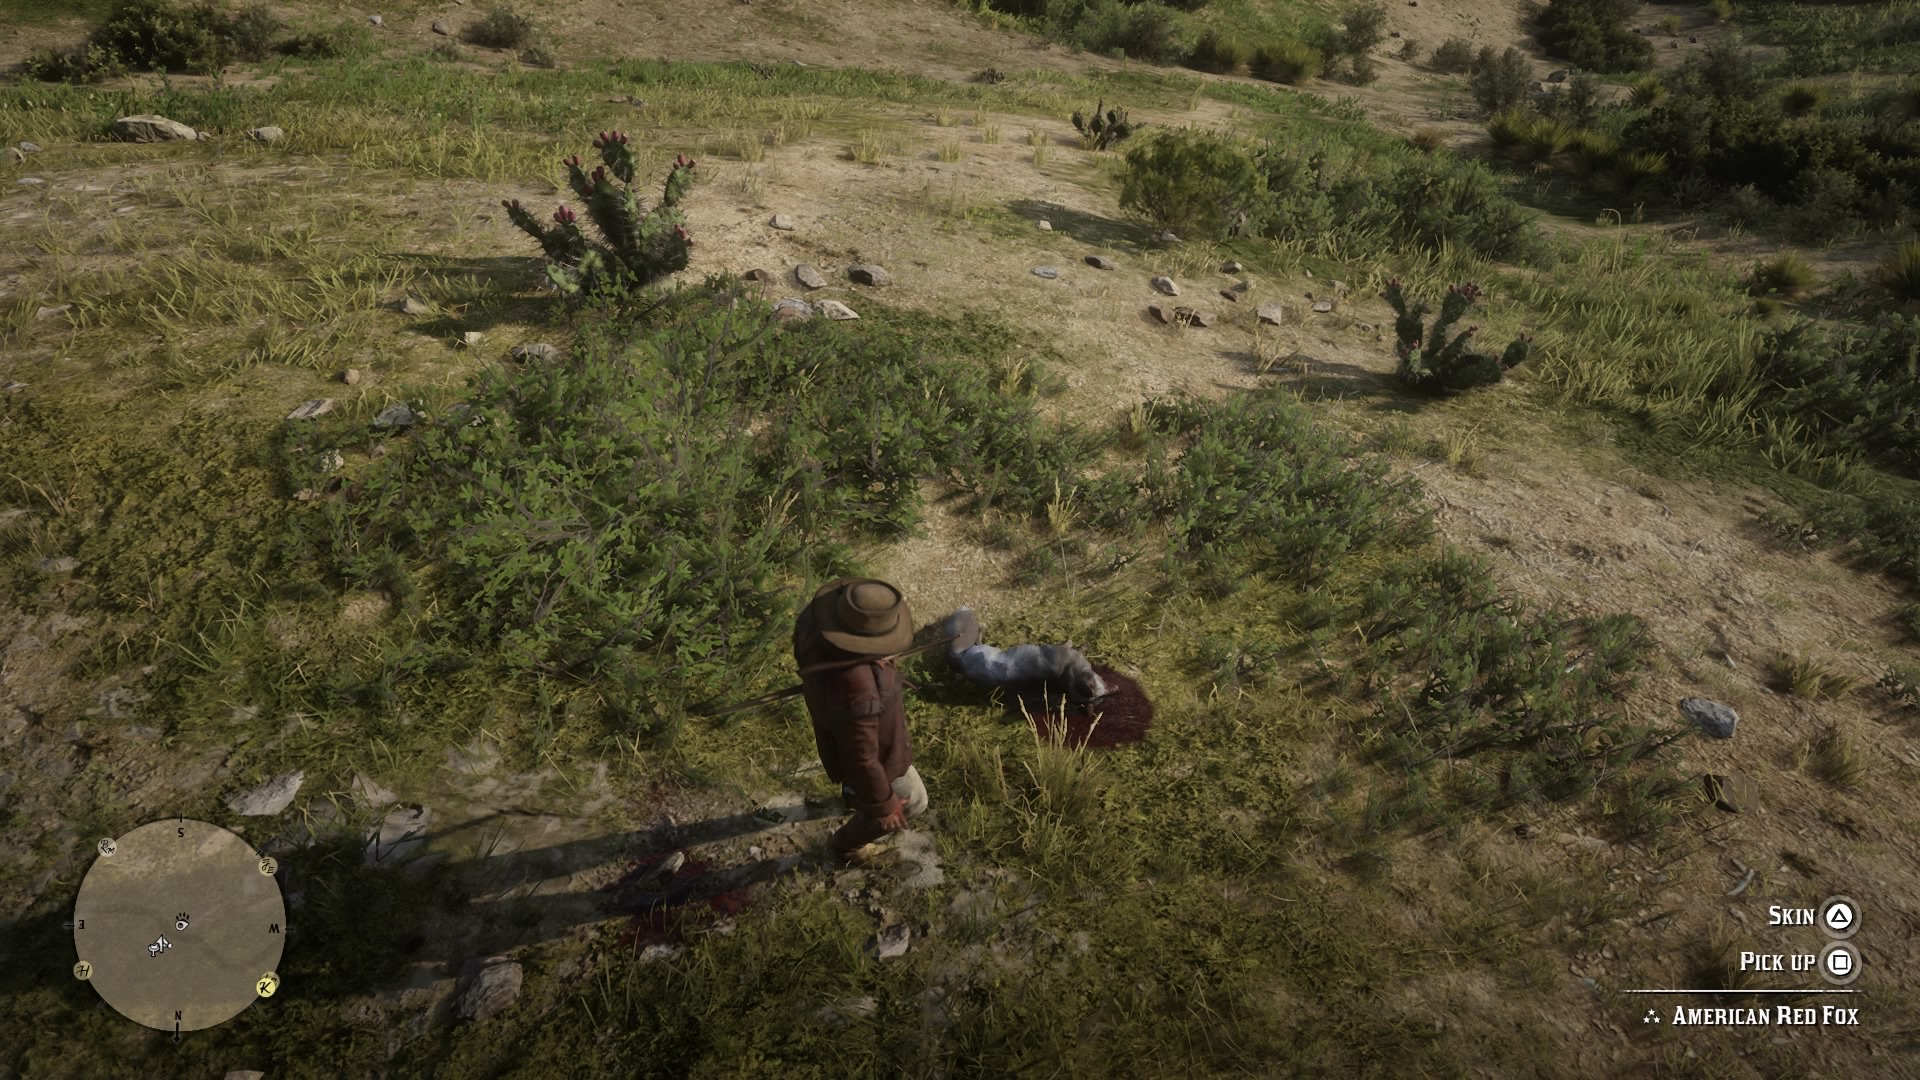
You’ve hunted an animal, skinned it, and now the pelt is in your hands. What now? First, you need to whistle or walk up to your horse, where you can “stow” the skin
until you’ve decided what to do with it. This adds it to your horse
cargo menu, so you can find it again either by walking up to your horse
and pressing right on the d-pad, or by selecting the Horse Cargo section
of a shop menu.
Once you’ve stored the pelts on the back of your horse, you can do a few things with them. Sell them at a general store in town, donate them to Mr. Pearson at camp, or most importantly, take your best pelts to the Trapper to craft new equipment. Once you’re at the Trapper, sell your skins to him, and they’ll appear in his inventory for crafting equipment.
We have a full guide on where to find the Trapper in Red Dead Redemption 2, so take a look at that if you’ve got some decent skins.
Pelts that you’ve stored on the back of your horse aren’t safe, however. If you die, it looks like they’re gone forever. Don’t worry too much about Legendary skins though – if
you lose the Legendary Bear Skin, or any other Legendary pelt for that
matter, it will be automatically sent to the Trapper so you can craft
the unique outfit item that it’s linked to. If you can’t find the Legendary skin you’ve looted, try looking at the Trapper.
But that does mean once you’ve found some pelts, make your way to get them crafted as soon as possible.
Where to sell pelts in Red Dead Redemption 2
You can sell pelts to most general stores and some stores that sell hunting equipment
in Red Dead Redemption 2. It’s probably a better idea to save your best
skins for crafting though, since you can make unique items you can’t
get anywhere else. But if you’re looking for a few more dollars to
contribute to the camp kitty, there are worse pursuits than trading in
spare skins.
In the very early game, the best place to sell your pelts will be in
Valentine, since you’ve got access to different kinds of shops there.
How to get perfect pelts in Red Dead Redemption 2
Getting a perfect pelt can be finicky to begin with, but once you get
the hang of it, you’ll be hitting the bulls-eye every time. To identify which animal’s going to produce a perfect pelt, you’re going to need to use binoculars.
You can find these in the “kit” tab of your satchel. With the
binoculars equipped, hold the left trigger and use the left stick to
zoom in.
You can also equip your binoculars from the right hand side of your item wheel.
Once you’ve got an animal in view, hold the right shoulder button (R1 on PS4) to study and identify the creature.
Next to its name will be three stars. Animals with all three stars filled in can produce a perfect pelt.
But there’s still a catch. Being too rough with a skin will damage it
and lower its quality, so you can’t use too high-powered of a weapon to
bring down the beast. Now that you’ve found a three star animal, use the weapon it tells to you use in the Compendium to kill it, and you should receive a three star pelt when you skin it.
To view the Compendium, enter the pause menu and select “Progress”.
The information can also be displayed by pressing the right shoulder
button (R1 on PS4) while you’re looking at an animal through binoculars.
We’ve listed the different ammo types that you can use to cleanly kill different types of game below:
Red Dead Redemption 2 – weapons and ammo for perfect pelts
How to get Perfect Rabbit Pelts and Perfect Bison Pelts
Small animals – These are killed with a bow, using small game arrows, if you want perfect pelts.
Small animals include rats, bats, squirrels, chipmunks, bullfrogs,
toads, snakes, blue jays, cardinals, robins, woodpeckers, and other
small species of bird.
Moderate animals – these must be killed with the varmint rifle with 0.22 ammo for pristine pelts.
Moderate animals include iguanas, gila monsters, rabbits, armadillos,
badgers, muskrats, possums, raccoons, skunks, eagles, cranes, hawks,
owls, and other large species of birds.
Medium animals –
Kill these with the following ammo types: normal arrows, poison arrows,
throwing knives, poison throwing knives, any rifle ammo except
explosive, and any sniper ammo except explosive.
Medium animals include coyotes, foxes, pigs, and beavers.
Large animals – get pristine pelts by using the
following ammo types: normal arrows, poison arrows, poison throwing
knives, any rifle ammo except explosive, any sniper ammo except
explosive.
Large animals include turtles, small alligators, boars, bucks,
cougars, panthers, big horn rams, wolves, deer, pronghorns, goats,
sheep, and peccary.
Massive animals – Use these ammo types: poison
arrows, improved arrows, poison throwing knives, any rifle ammo except
explosive, any sniper ammo except explosive, and shotgun slugs.
Massive animals include bears, bison, bulls, elk, moose, ox, cows, and big alligators.
We’ve got plenty more guides to help you get the best out of Red Dead Redemption 2, including a full list of RDR2 cheats, beginners tips to get your started, and locations for all of the best weapons in the game.
Red Dead Redemption 2 Legendary Fish guide – How to unlock and find all the Legendary Fish
The American West has some of the best fishing in the world, and Red Dead Redemption 2
has a tankful of Legendary Fish to test your tackle against. Each of
these beauties are scattered in lakes and waterways across the map, so
here’s where to find every Legendary Fish in Red Dead Redemption 2.
How to unlock fishing and how to get a fishing pole in Red Dead Redemption 2
In Chapter 2 of the main story, you’ll eventually unlock a quest line
with John Marston called “Pouring Forth Oil”. After the third quest in
the series, another icon will appear on your map in camp where you have
to speak to Abigail. She’ll ask you to take the young kid around camp,
Jack, out fishing. After this quest, you’ll be able to fish.
Where to find every Legendary Fish in Red Dead Redemption 2
There are 14 Legendary Fish to dredge from the deep in RDR2, and you
can find them at any time, but to help you along there’s a side-quest
that unlocks a full Legendary Fish map.
On the northeastern bank of Flat Iron Lake – after you’ve unlocked
fishing by teaching Jack Marston – you’ll meet Jeremy Gill, a collector,
who’ll give you the “A Fisher of Fish” quest, along with the map you need.
To catch Legendary Fish, the next thing you’ll need is Legendary
Lures, which once you’ve met Gill can be bought from fishing shops in
large towns for $20 each – so $60 all in.
The three types you get are the Special Lake, Swamp and River Lures,
which will be enough for you to snag all 14 Legendary Fish.
Below are the locations – in alphabetical order – of all of them, alongside which type of lure they need:
Legendary Bluegill – Lake Lure – You’ll find the
Legendary Bluegill on the eastern bank of Flat Iron Lake, to the
southwest of where it says “Rhodes” on the map. You need to go south of
the small bay that’s east of the collection of islands in the Lake.
Legendary Bullhead Catfish – River Lure – This one
can be a bit tough to nick. You have to go to the Sisika Penitentiary
off the eastern coast of Saint Denis. The Bullhead Catfish is found in
the water between the two western islands of the Penitentiary.
Legendary Catfish – This is the fourteenth fish, which you get a shot at after landing the other thirteen as is its own sidequest.
Legendary Chain Pickerel – River Lure – An easier
Legendary fish to find is the Chain Pickerel. It’s just to the southwest
of the Horseshoe Overlook campsite, northwest of Flatneck Station,
where the Dakota River starts to bend around.
Legendary Large Sturgeon – River Lure – This fish
can be found on the southwestern tip of Saint Denis, where the river to
the west of the town opens up into a much larger body of water.
Legendary Largemouth Bass – Lake Lure – The
Largemouth likes the Lake Lure, despite being in the San Luis River,
just to the southeast of Lake Don Julio, which is itself south of
Armadillo.
Legendary Longnose Gar – Swamp Lure – You find the Gar around the south bank of Lake Lagras, north of Saint Denis.
Legendary Muskie – River Lure – To the east of
Emerald Ranch, you can find the Muskie on the southern side of where Van
Horn trading post is printed on the map.
Legendary Perch – Lake Lure – This is another of
the easier fish to find. Head to the Elysian Pool, which is northeast of
the Emerald Ranch, to land the Perch.
Legendary Redfin Pickerel – Lake Lure – You get
this fish from Stillwater Creek, which is the western-most stream that
comes out of the Lower Montana River to the west of Thieves Landing and
to the East of MacFarlane’s Ranch.
Legendary Rock Bass – Lake Lure – The Rock Bass is in the Aurora Basin, which is a good way west of Blackwater.
Legendary Smallmouth Bass – Lake Lure – This variety of Bass is found to the west of Strawberry, on the eastern bank of Owanjila.
Legendary Sockeye Salmon – Lake Lure – The Sockeye
is found in the southern part of Lake Isabella, which is up in the
mountains to the northwest of Valentine.
Legendary Steelhead Trout – You find the Steelhead
right on the edge of the playable area of the map, up in the northeast
corner. The fish is northeast of the Brandywine Drop, which is north of
Annesburg, at the top of the river.
For more on where to find rare things throughout Arthur Morgan’s adventure, take a look at our guide to the best weapons in Red Dead Redemption 2.
Red Dead Redemption 2 gunslinger guide: all locations and revolvers
Hunt down famous shootists from the Old West, take their photographs, and most likely, shoot ’em dead.
You can start the Gunslinger side-quests in Red Dead Redemption 2 by visiting the second saloon in Valentine, the first town you visit. This isn’t the big saloon where a lot of story missions take place, but the one off the main street.
Talk to the writer here, Calloway, and he’ll ask you to track down a group of Gunslingers for the mission The Noblest of Men, and a Woman.
He wants you to come back with their photographs and stories of their
legendary days in the Wild West. For the majority of cases, these groups
of gunslingers don’t really want to be disturbed and you’ll usually end
up in a gunfight and a duel to the death, so go prepared.
Red Dead Redemption Legendary Gunslingers Side Quest
Firstly, pull up the photos he gives you and inspect them. Once you
do this the gunslinger’s location will be marked on the map. You’ll get
access to four gunslingers at a time and can chase them down in any
order, but we recommend the following order as some of these missions
will get you a decent unique weapon upgrade or other significant items
like a treasure map. Warning: the majority of these Gunslingers will drop a unique weapon. This is great, but make sure you pick it up after you’ve killed them. You won’t get a second chance.
Emmet Granger
You’ll find this hog-fancier near Flat Iron Lake.
Start a conversation with him and then you’ll have to clean up four
piles of pig shit. Once that’s done you’ll antagonise him into a draw.
Shoot before he throws the knife and then go over and photograph his
body. Mission accomplished. Now pick up Granger’s Pistol and keep it for
yourself.
Billy Midnight
Billy’s a recluse, hiding out near Rhodes Train Station.
Talk to the station manager and he’ll put you on the next train, where
you’ll find Billy. Give chase and you’ll have to draw against him on a
carriage roof. He’s fast, but if you put him down you’ll earn Midnight’s Pistol for your troubles. Take his photograph and you’re done.
Black Belle
Black Belle is hiding out in Bluewater Marsh and you
should head here after Billy Midnight because it’s close to Rhodes.
When you arrive you’ll be helping her fend off against a few waves of
bounty hunters. You can defend the homestead and use the planted
explosives to take out a couple at a time, but make sure you prioritise
taking out the gatling gun when it arrives. With that done, take Belle’s
photograph and you’re done.
Loot the dead if you like, and check Belle’s shack for a Cigarette Card.
Flaco Hernandez
Falco runs with a gang of at killers, so go armed accordingly. He’s also in The Grizzlies,
so it’s worth changing into winter clothes to stay warm. You’ll find
his camp around a frozen lake, and there’s the opportunity to approach
quietly and stealth kill a bunch of gang members. Once you’ve dealt with
his boys you can take down Flaco, take Flaco’s Revolver, and find a cigarette card and a The Poisonous Trail Treasure map in his cabin. That’s some good lootin’!
After tracking down the four gunslingers, you’ll notice Calloway has
disappeared from the map. Don’t worry, the final chapter of this mission won’t open up until later in Chapter 4. Return to the saloon in Valentine and speak to the bartender, who will send you to Saint Denis and the Grand Korrigan riverboat. Speak to Calloway to reveal the final Gunslinger, Slim Grant.
Slim Grant
You’ll first need to go to the Sherif in Annesburg and then to the outlaw camp to the west of Annesburg. Take out the bandits and untie Slim, to take him to Brandywine Drop.
You’ll now have to face-off for a duel. Kill the Gunslinger and you
can take his weapon – and the Gunslingers side-quests are all complete.
Red Dead Redemption 2: All 20 Dreamcatcher locations and Ancient Arrowhead treasure
There are loads of things to do in Red Dead Redemption 2, including a nifty little side quest to find some Dreamcatchers.
There are 20 Dreamcatchers to be found in Red Dead
Redemption 2 as part of the Dreamcatchers questline. If you manage to
find them all you’ll be rewarded with the Ancient Arrowhead treasure.
The Dreamcatchers can be found all around the map and the guys at
Arekkz Gaming have made this handy video guide to help you out further.
Some of them are quite large and easy to spot whereas some are a
little trickier to see. The time of day will also affect their
visibility. Most of them seem to be on trees that stand out from the
others, either by being much larger or looking pretty dead.
Red Dead Redemption 2: Dreamcatcher locations
Here are the locations of the first 10 Dreamcatchers to get you started:
The first Dreamcatcher can be found just Northwest of Latneck Station, across from the Dakota River. It is quite large and is hanging from a tree.
The next is very slight Southwest of Caliban’s Seat. Run over to this collection of trees to find it.
For this Dreamcatcher, set a marker on your map just below the first “E” near the town of Valentine,
just off the dirt track. There’s a large tree with a stump in front of
it that has the third more colourful Dreamcatcher hanging from its
branches.
The fourth Dreamcatcher can be found near The Grizzles and is more difficult to find. Set a waypoint just below the S in “West”, Northeast of Cattail Pond. Head up into the mountains until you reach a clearing. On a dead looking tree you’ll find the fourth Dreamcatcher.
This next Dreamcatcher is North of the Dakota River,
Southwest of Window Rock. Set a waypoint just off the beaten track.
There should be a fallen tree to your left, so go a little further up
the hill and on your left will be a tree with a Dreamcatcher hanging
from it.
Now, set a waypoints marker roughly in-between Cotorra Springs and Bacchus Bridge
to find this next Dreamcatcher. There will be a clearing with lots of
skinny trees and one much larger tree where you’ll find it hanging from
the branches.
Head over to the East of the map near the location labelled The Loft,
which is to the Northeast of the Grizzlies East map point. Just in
front of this structure is another dead looking tree with a Dreamcatcher
hanging from it.
This time, set a waypoint on the just above the road between Annesburg and Roanoke Valley. Again, head into the trees to spot this fairly obvious Dreamcatcher.
Our next location is just Southwest of where you previously were, roughly between the “N” and the “E” of Annesburg on the map. Head to the point where the road splits and there will be a Dreamcatcher hanging from the tree to your left.
Dreamcatcher number 10 can be found Southeast of the previous location, near the road between the “U” and the “R” of Annesburg on the map. Head up the hill and watch out for wolves when trying to interact with this one!
You’re halfway there! It might not look like it now, but the
locations of each Dreamcatcher form a picture on the map that we’ll get
to later. For now, here are the final 10 locations:
Number 11 is directly South of Annesburg, just off the road. There should be a large rock to your left and you can head into the trees to find the next Dreamcatcher.
For this next Dreamcatcher, head South the Elysian Pool. Head past a large bush to an even larger tree to find this one.
Set a waypoint between where the road forks just above the “B” at Bluewater Marsh. There’s a tree in the middle of these two paths where you’ll find the next Dreamcatcher.
Head West from this point, just above Lonnie’s Shack on the map. Just off the path, you’ll find another dead tree with a Dreamcatcher hanging from it.
This next Dreamcatcher can be found West of the Aberdeen Pig Farm. This one is easy to find as it’s the only tree in a wide, open space and the Dreamcatcher is big enough to spot straight away.
For this one, set a waypoint marker on the inner right hand side of the “O” in the New Hanover label on the map. Go up the hill, up past the rail track to find your next Dreamcatcher on a large tree.
Head over to the East of Guthrie Farm, South of Heartland Overflow to find this next one. You’ll need to go off the beaten track to find a somewhat isolated tree and your next Dreamcatcher.
Number 18 can be found near the “N” on The Heartlands label of the map. Again, there is a lonely barren tree with a Dreamcatcher to be found swinging from its branches.
Set a waypoint slightly Northeast of Citadel Rock to find the penultimate Dreamcatcher. Right off the pathway to the left is where you’ll find it.
For the final sign, set a waypoint beside the first “E” in New Hanover. It’s hanging from a tree to the left of the railroad tracks
Once you’ve interacted with the final Dreamcatcher, Arthur will pull
out his notebook to reveal there is one final marker you haven’t
discovered yet. You’ll see that the shape resembles a bull or buffalo
somewhat.
The final marker is at the Elysian Pool. Set a waypoint for the Northern part of the Pool, and head behind the waterfall. We suggest bringing a lantern with you as the path is dark, but the minimap does guide you pretty well.
This location also makes up part of the Poisonous Trail Treasure Hunt, so you can kill two birds with one stone.
Head through the cave until the path splits and take a right. You’ll
see some light streaming in. Climb the rocks in front of you until you
see an ancient cave painting on the walls to the right.
Walk up to the painting and interact with what looks like the eye of a bull to collect your reward, the Ancient Arrowhead treasure. Congratulations! You did it. Now, get back to collecting resources for your camp already.